Ok, I'm sure I could figure this out, but I'm thinking someone may come up with a good answer before I'd get it going.
I've got a PictureBox with a picture in it. What I need is a rectangle that moves around over the PictureBox. Don't worry about how it moves. I've already got that sorted.
What I need is an easy approach to getting a rectangle (with transparent middle) that floats over the PictureBox.
As we know, the windowless Shape controls are in a layer behind the windowed controls. So that's not an answer. I'm certainly willing to use a second PictureBox, but that forces me to dig through some code to make it transparent. I'll probably sort through that tomorrow if someone doesn't have an easier answer.
Thanks,
Elroy
Any software I post in these forums written by me is provided "AS IS" without warranty of any kind, expressed or implied, and permission is hereby granted, free of charge and without restriction, to any person obtaining a copy. To all, peace and happiness.
You can use a borderless picbox or borderless form. Instead of transparency, cut out the center leaving only x number of pixels along the outer edges to act as a 'border'. By setting the backcolor of the picbox/form (autoredraw=true), you in effect create a colored border.
APIs: CombineRgn, CreateRectRgn, SetWindowRgn
Insomnia is just a byproduct of, "It can't be done"
I just found your PicBuddy project, but that looks like substantial overkill for what I'm trying to do.
I'm about done for the day, but I'll get this sorted tomorrow. Thanks.
Elroy
Any software I post in these forums written by me is provided "AS IS" without warranty of any kind, expressed or implied, and permission is hereby granted, free of charge and without restriction, to any person obtaining a copy. To all, peace and happiness.
1. Add a picturebox to a form. Make picturebox borderless
2. Add this code in form and run project
3. For the fun of it, stuff a command button behind the picture box
Code:
Option Explicit
Private Declare Function SetWindowRgn Lib "user32.dll" (ByVal hWnd As Long, ByVal hRgn As Long, ByVal bRedraw As Long) As Long
Private Declare Function CreateRectRgn Lib "gdi32.dll" (ByVal X1 As Long, ByVal Y1 As Long, ByVal X2 As Long, ByVal Y2 As Long) As Long
Private Declare Function CombineRgn Lib "gdi32.dll" (ByVal hDestRgn As Long, ByVal hSrcRgn1 As Long, ByVal hSrcRgn2 As Long, ByVal nCombineMode As Long) As Long
Private Declare Function DeleteObject Lib "gdi32.dll" (ByVal hObject As Long) As Long
Private Const RGN_DIFF As Long = 4

Private Sub Form_Load()
    Me.BackColor = vbWhite
    Picture1.BackColor = vbRed

    Dim hRgnOuter As Long, hRgnInner As Long

    With Picture1
        .ScaleMode = vbPixels  ' change back to whatever afterwards if desired
        hRgnOuter = CreateRectRgn(0, 0, .ScaleWidth, .ScaleHeight)
        hRgnInner = CreateRectRgn(6, 6, .ScaleWidth - 6, .ScaleHeight - 6)
        CombineRgn hRgnOuter, hRgnOuter, hRgnInner, RGN_DIFF
        SetWindowRgn .hWnd, hRgnOuter, True
    End With
    DeleteObject hRgnInner

End Sub
The hardcoded border width is 6 pixels. Change to taste.
Edited: Removed AutoRedraw call -- not needed if using just the backcolor property for a background.
You can make a picturebox transparent/semi-transparency since Win8 or Win8.1, I forget which. However, since you want a border but no inner portion and you mentioned the word "rectangle", I think the above is about as simple as it gets.
Last edited by LaVolpe; Sep 14th, 2017 at 07:00 PM.
Insomnia is just a byproduct of, "It can't be done"
Something like this? And there's no clean-up for this stuff?
Code:
Option Explicit

Public Declare Function SetWindowRgn Lib "user32" (ByVal hWnd As Long, ByVal hRgn As Long, ByVal bRedraw As Boolean) As Long
Public Declare Function CreateRectRgn Lib "gdi32" (ByVal X1 As Long, ByVal Y1 As Long, ByVal X2 As Long, ByVal Y2 As Long) As Long
Public Declare Function CombineRgn Lib "gdi32" (ByVal hDestRgn As Long, ByVal hSrcRgn1 As Long, ByVal hSrcRgn2 As Long, ByVal nCombineMode As Long) As Long
Public Const RGN_OR = 2
'

Public Sub MakeTransparentBox(pic As PictureBox)
    ' Leaves a one pixel border.
    ' Should be borderless.
    ' Scalemode Pixels.
    ' Just set the pic backcolor to use as the border.
    '
    Dim Rgn1 As Long
    Dim Rgn2 As Long
    Dim Rgn3 As Long
    Dim Rgn4 As Long
    Dim RgnAll As Long
    '
    RgnAll = CreateRectRgn(0, 0, 0, 0)
    Rgn1 = CreateRectRgn(0, 0, 1, pic.Height)
    Rgn2 = CreateRectRgn(0, 0, pic.Width, 1)
    Rgn3 = CreateRectRgn(pic.Width - 1, 0, pic.Width, pic.Height)
    Rgn4 = CreateRectRgn(0, pic.Height - 1, pic.Width, pic.Height)
    '
    CombineRgn RgnAll, Rgn1, Rgn2, RGN_OR
    CombineRgn RgnAll, RgnAll, Rgn3, RGN_OR
    CombineRgn RgnAll, RgnAll, Rgn4, RGN_OR
    '
    SetWindowRgn pic.hWnd, RgnAll, True
End Sub
Thanks,
Elroy
EDIT: hahahaha, and this time it was YOU who didn't give me a chance to "think".
Last edited by Elroy; Sep 14th, 2017 at 07:15 PM.
Any software I post in these forums written by me is provided "AS IS" without warranty of any kind, expressed or implied, and permission is hereby granted, free of charge and without restriction, to any person obtaining a copy. To all, peace and happiness.
Okay, I saw your DeleteObject calls, so I'm thinking that mine should be something like this...
Code:
Option Explicit

Private Declare Function SetWindowRgn Lib "user32" (ByVal hWnd As Long, ByVal hRgn As Long, ByVal bRedraw As Boolean) As Long
Private Declare Function CreateRectRgn Lib "gdi32" (ByVal X1 As Long, ByVal Y1 As Long, ByVal X2 As Long, ByVal Y2 As Long) As Long
Private Declare Function CombineRgn Lib "gdi32" (ByVal hDestRgn As Long, ByVal hSrcRgn1 As Long, ByVal hSrcRgn2 As Long, ByVal nCombineMode As Long) As Long
Private Declare Function DeleteObject Lib "gdi32.dll" (ByVal hObject As Long) As Long
'

Public Sub MakeTransparentBox(pic As PictureBox)
    ' Leaves a one pixel border.
    ' Should be borderless.
    ' Scalemode Pixels.
    ' Just set the pic backcolor to use as the border.
    '
    Const RGN_OR = 2
    Dim Rgn1 As Long
    Dim Rgn2 As Long
    Dim Rgn3 As Long
    Dim Rgn4 As Long
    Dim RgnAll As Long
    '
    RgnAll = CreateRectRgn(0, 0, 0, 0)
    Rgn1 = CreateRectRgn(0, 0, 1, pic.Height)
    Rgn2 = CreateRectRgn(0, 0, pic.Width, 1)
    Rgn3 = CreateRectRgn(pic.Width - 1, 0, pic.Width, pic.Height)
    Rgn4 = CreateRectRgn(0, pic.Height - 1, pic.Width, pic.Height)
    '
    CombineRgn RgnAll, Rgn1, Rgn2, RGN_OR
    CombineRgn RgnAll, RgnAll, Rgn3, RGN_OR
    CombineRgn RgnAll, RgnAll, Rgn4, RGN_OR
    '
    SetWindowRgn pic.hWnd, RgnAll, True
    '
    DeleteObject Rgn1
    DeleteObject Rgn2
    DeleteObject Rgn3
    DeleteObject Rgn4
    'DeleteObject RgnAll ' Let's not delete this one.  Windows will take care of it.
End Sub
Correct?
EDIT: The last DeleteObject not done as per LaVolpe (see next post).
Last edited by Elroy; Sep 14th, 2017 at 07:55 PM.
Any software I post in these forums written by me is provided "AS IS" without warranty of any kind, expressed or implied, and permission is hereby granted, free of charge and without restriction, to any person obtaining a copy. To all, peace and happiness.
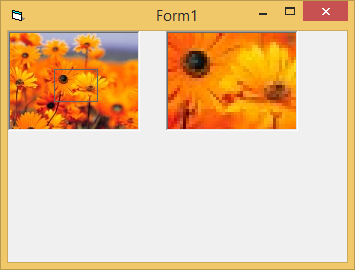
EDIT1: The top portion is a PictureBox in a PictureBox, where you can drag around (within bounds) the interior PictureBox.
EDIT2: I think this one is done.
Last edited by Elroy; Sep 14th, 2017 at 07:53 PM.
Any software I post in these forums written by me is provided "AS IS" without warranty of any kind, expressed or implied, and permission is hereby granted, free of charge and without restriction, to any person obtaining a copy. To all, peace and happiness.
Maybe I missed something obvious, but you can just place a shape control inside the PictureBox control.
The PictureBox is a container control after all.
Code:
Option Explicit

Private Sub Form_Load()
  Set Shape1.Container = Picture1
  Shape1.BorderColor = vbRed
  Shape1.BorderWidth = 4
End Sub

Private Sub Picture1_MouseMove(Button As Integer, Shift As Integer, X As Single, Y As Single)
  If Button = vbLeftButton Then Shape1.Move X, Y
End Sub
@Arnoutdv: Hmmm, you may be correct. I didn't try it though. Also, I wanted the transparent box to go one pixel outside of the actual borderless picture. I suppose I could have worked that out too, but the way I (we, including LaVolpe) worked it out was pretty straightforward.
Take Care,
Elroy
Any software I post in these forums written by me is provided "AS IS" without warranty of any kind, expressed or implied, and permission is hereby granted, free of charge and without restriction, to any person obtaining a copy. To all, peace and happiness.
Maybe I missed something obvious, but you can just place a shape control inside the PictureBox control.
The PictureBox is a container control after all.
Code:
Option Explicit

Private Sub Form_Load()
  Set Shape1.Container = Picture1
  Shape1.BorderColor = vbRed
  Shape1.BorderWidth = 4
End Sub

Private Sub Picture1_MouseMove(Button As Integer, Shift As Integer, X As Single, Y As Single)
  If Button = vbLeftButton Then Shape1.Move X, Y
End Sub
Yup. Seems far simpler. Or, if you really want the box to be a window, you could create a UserControl with a transparent background, like so...
If you don't know where you're going, any road will take you there...
@ColinE66: Yeah, not the worst of ideas. UC with BorderWidth & BorderColor properties. Not the worst of ideas. If I use this in multiple locations, I'll probably do that.
And, truth be told, I've already got a "software development tool" that does precisely what you're doing. My tool doesn't even work as nifty as what we've done here.
The red box you see (along with the W:## H:##) is a completely different program. I use that "tool" all the time to make perfect alignment of certain things, especially in Word and Excel when aligning figures. It's also useful on large VB6 forms under certain circumstances, but the IDE has pretty good alignment tools too.
EDIT1: Just an FYI, I developmed that red box "tool". I'll post the code for it if someone wants, but it could definitely use some improvements.
Any software I post in these forums written by me is provided "AS IS" without warranty of any kind, expressed or implied, and permission is hereby granted, free of charge and without restriction, to any person obtaining a copy. To all, peace and happiness.
... on the Property Page for the ellipse button? It seems that you could prevent it from flickering if you didn't give it a region.
Just something that flashed through my mind.
Best Regards,
Elroy
Any software I post in these forums written by me is provided "AS IS" without warranty of any kind, expressed or implied, and permission is hereby granted, free of charge and without restriction, to any person obtaining a copy. To all, peace and happiness.
FWIW, here's an API-free-solution for this Zooming-scenario (including the Drag-Handling),
looking like that:
Into a Form (no Controls need to be added, just adjust the FilePath to a smaller Test-Image)
Code:
Option Explicit

Private PV As PictureBox, PL As PictureBox, WithEvents L As Label

Private Sub Form_Load()
  Set PV = Controls.Add("VB.PictureBox", "PV") 'a PB with a small Preview-Img
      PV.Visible = True: PV.AutoSize = True
  Set PV.Picture = LoadPicture("c:\temp\test.jpg") '<- adapt the Image-FileName

  Set L = Controls.Add("VB.Label", "L", PV) 'a transparent Label on PV
      L.Visible = True: L.BackStyle = 0: L.Appearance = 0: L.BorderStyle = 1
      L.Move 0, 0, PV.Width / 3, PV.Height / 3

  Set PL = Controls.Add("VB.PictureBox", "PL") 'the target-PicBox
      PL.Visible = True: PL.Move PV.Width * 1.2, 0, PV.Width, PV.Height
End Sub

Private Sub L_MouseMove(Button As Integer, Shift As Integer, X As Single, Y As Single)
  Static X0!, Y0!
  If Button Then X = X + L.Left: Y = Y + L.Top Else X0 = X: Y0 = Y: Exit Sub

  If X < 0 Then X = 0 Else If X > PV.Width Then X = PV.Width
  If Y < 0 Then Y = 0 Else If Y > PV.Height Then Y = PV.Height

  L.Move X - X0, Y - Y0
  PL.Cls
  PL.PaintPicture PV.Picture, 0, 0, PL.Width, PL.Height, L.Left, L.Top, L.Width, L.Height
End Sub
Olaf
Last edited by Schmidt; Sep 15th, 2017 at 11:44 AM.
Interesting code. However, this isn't exactly a zooming scenario. Overall, these foot pressure "images" are just blown-up by 4 (one sensel = four pixels) just for the convenience of the user. It just makes it easier for the user to view and manipulate the images on the screen.
Now, for these larger images, I just needed to crop them down to a more "conventional" size so they could be further manipulated. In that video, for the purposes of cropping, I'm showing both the 4x image and the 1x image.
These images go through a great deal of math. Just briefly, these images actually represent a dynamic event, something we call a "step event". Imaging walking in wet sand. As you walk, you'll be leaving foot-print impressions in the sand for each "step" you take (i.e., step events). The mat typically collects data at 40 hertz (40 "frames" per second). However, we take these frames and find the highest value for each sensel, and build an image out of these max values. This is very much like those footprints in the sand. You raise your heel, but the imprint stays.
Therefore, for the static analysis, all the data are reduced to one "peak (or max)" frame (image). That is what you're seeing in the video (and below).
From there, we rotate and scale that image onto a "standardized image", and then calculate relative foot pressure distributions over five areas of the foot (medial fore, lateral fore, medial mid, lateral mid, & heel). And then, that's all compared to a database of "typically developing" people.
And that's just the static (peak) analysis.
We also have a dynamic analysis whereby the entire "movie" (all the frames, not collapsed into peak) is analyzed. We look at COP (center of pressure), and how COP transitions through the foot. For most people it's fairly centered in the foot until final toe-off during the step event. During toe-off, the COP typically transitions medially, as we push off with our big toe more than our little toe. We do this dynamic analysis for both back to forward timings, as well as medial to lateral COP deviations.
Here, to give you an idea, this is just a piece of a test foot report (That might be my foot, as I don't really remember):
Take Care,
Elroy
EDIT1: Just for those interested, all done with VB6. Well, other than getting the raw data files, which are produced with software provided by the pressure mat manufacturer.
Last edited by Elroy; Sep 15th, 2017 at 01:12 PM.
Any software I post in these forums written by me is provided "AS IS" without warranty of any kind, expressed or implied, and permission is hereby granted, free of charge and without restriction, to any person obtaining a copy. To all, peace and happiness.


 Reply With Quote